Taska iOS 27 Lock Screen Setup Guide

Taska Guide · iOS 27

iOS 27 Lock Screen Setup Guide

Follow these six visual steps. Your Taska Lock Screen automation will be ready in about two minutes.

About 2 minutes

Before you start

  • Update your iPhone to iOS 27 or later.
  • Have Taska and the Shortcuts app ready.
  • Choose one photo to use for the Lock Screen.
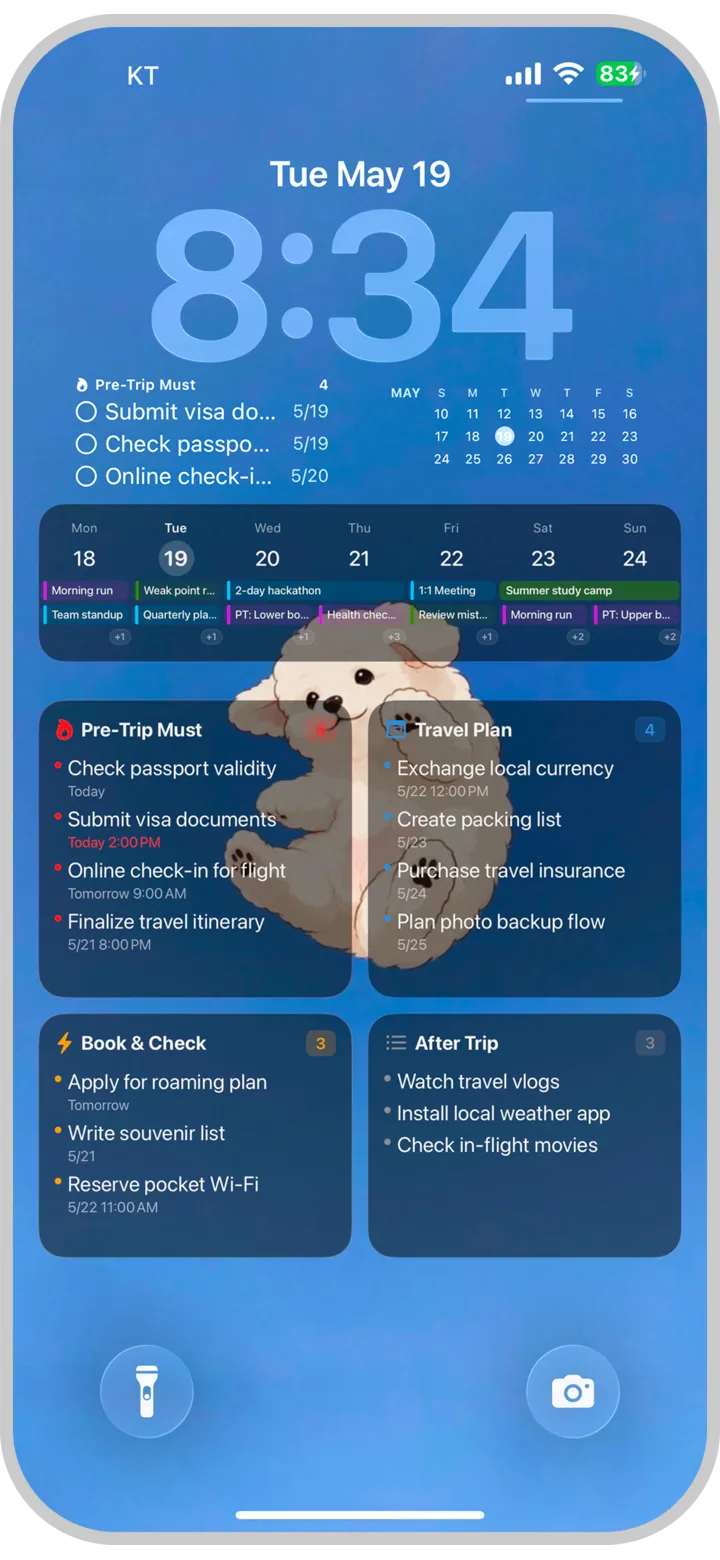
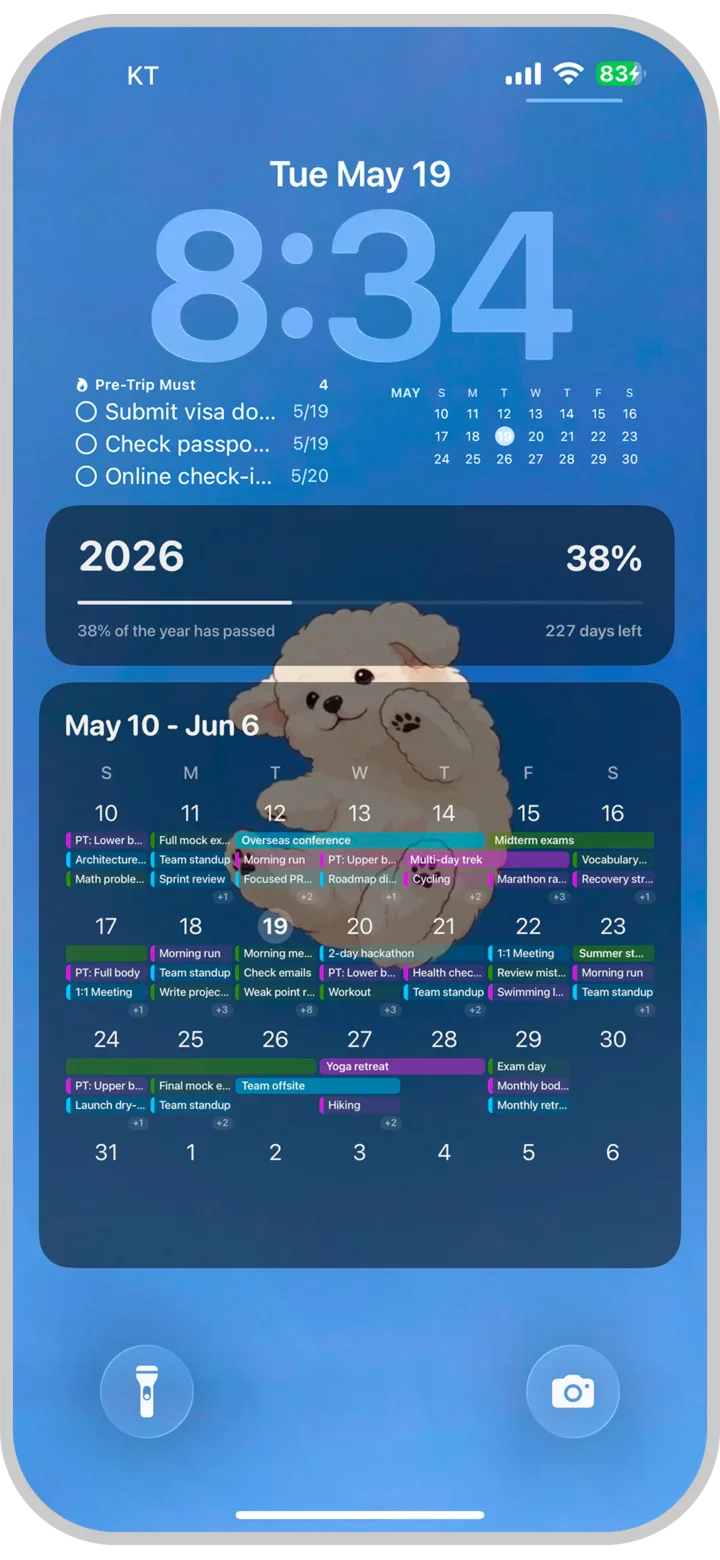
A completed Lock Screen showing the Taska calendar
Taska calendar Lock Screen
A completed Lock Screen showing the Taska matrix
Taska matrix Lock Screen
1

Create a Photo Lock Screen

Touch and hold the Lock Screen, tap the plus button, and create a Photo Lock Screen. Any photo is fine because Taska will replace it at the end.

  • Choose Photos under Add New.
  • Pick a photo, then tap Set as Wallpaper Pair.
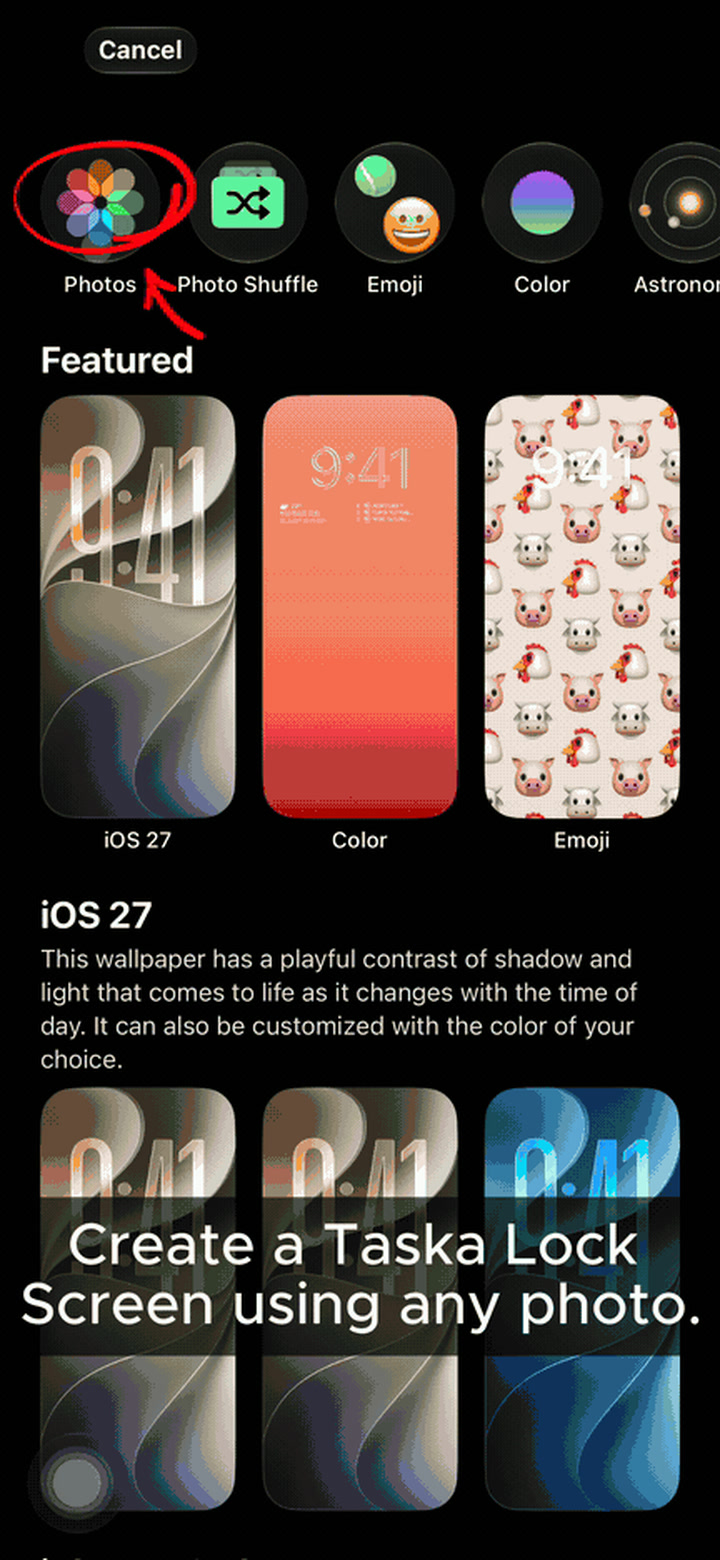
Creating a new Photo Lock Screen on iOS 27
Touch and hold → Add New → Photos
2

Customize your Lock Screen

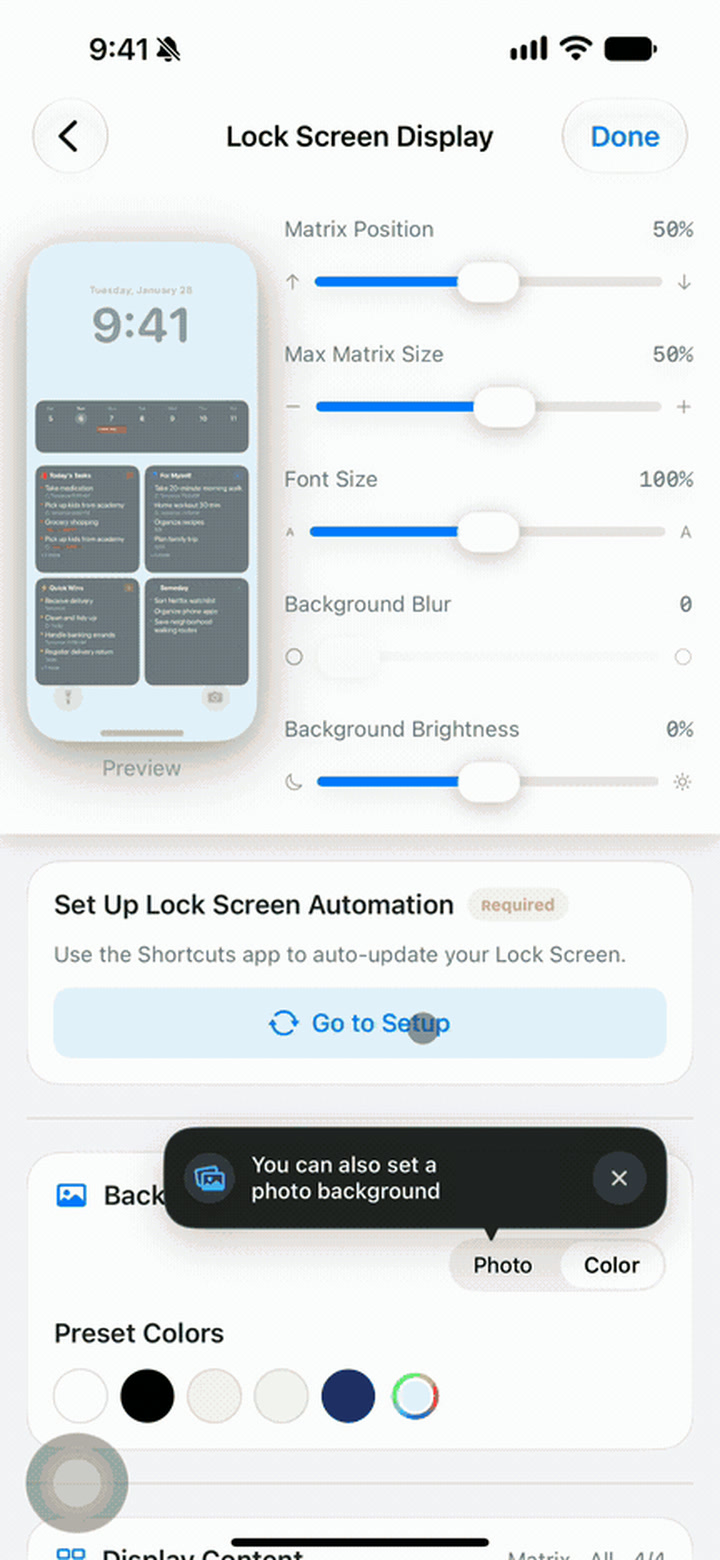
In Taska's Lock Screen Display settings, adjust the matrix position, size, text size, and background until the preview looks the way you want. For this step, just finish the layout.

  • Check the finished look in the preview at the top.
  • Once the layout looks right, move to the next step.
Taska Lock Screen Display settings for adjusting the matrix layout and background
Taska Lock Screen Display settings
3

Add the Taska Shortcut

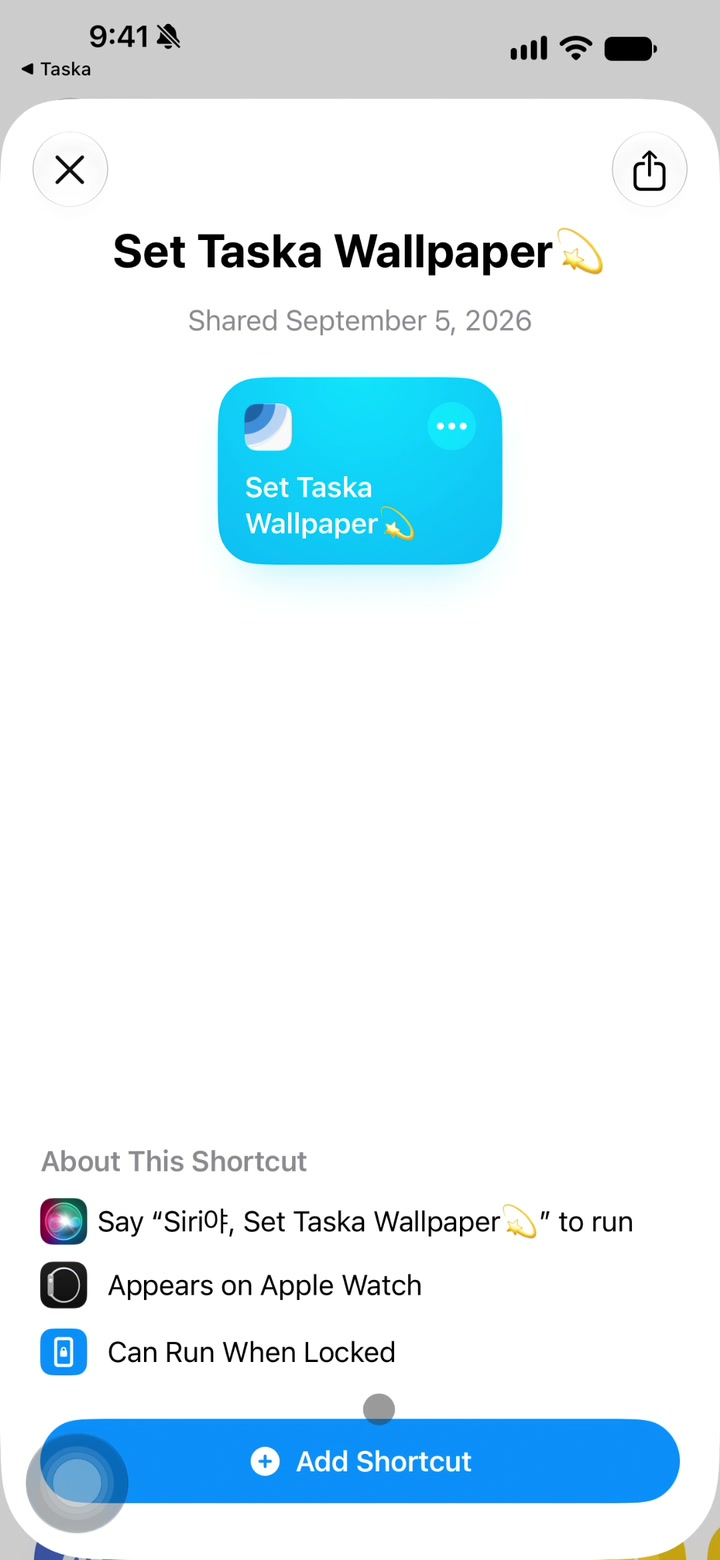
Tap Go to Setup, choose Add Shortcut, then tap Add Shortcut on the page that opens. When the new Taska shortcut appears in All Shortcuts, this step is complete.

  • Go to Setup → Add Shortcut
  • Tap Add Shortcut on the page that opens.
Moving from Taska setup to the Shortcuts page and adding the Taska wallpaper shortcut
Go to Setup → Add Shortcut → Add Shortcut
4

Open the shortcut and turn on both automations

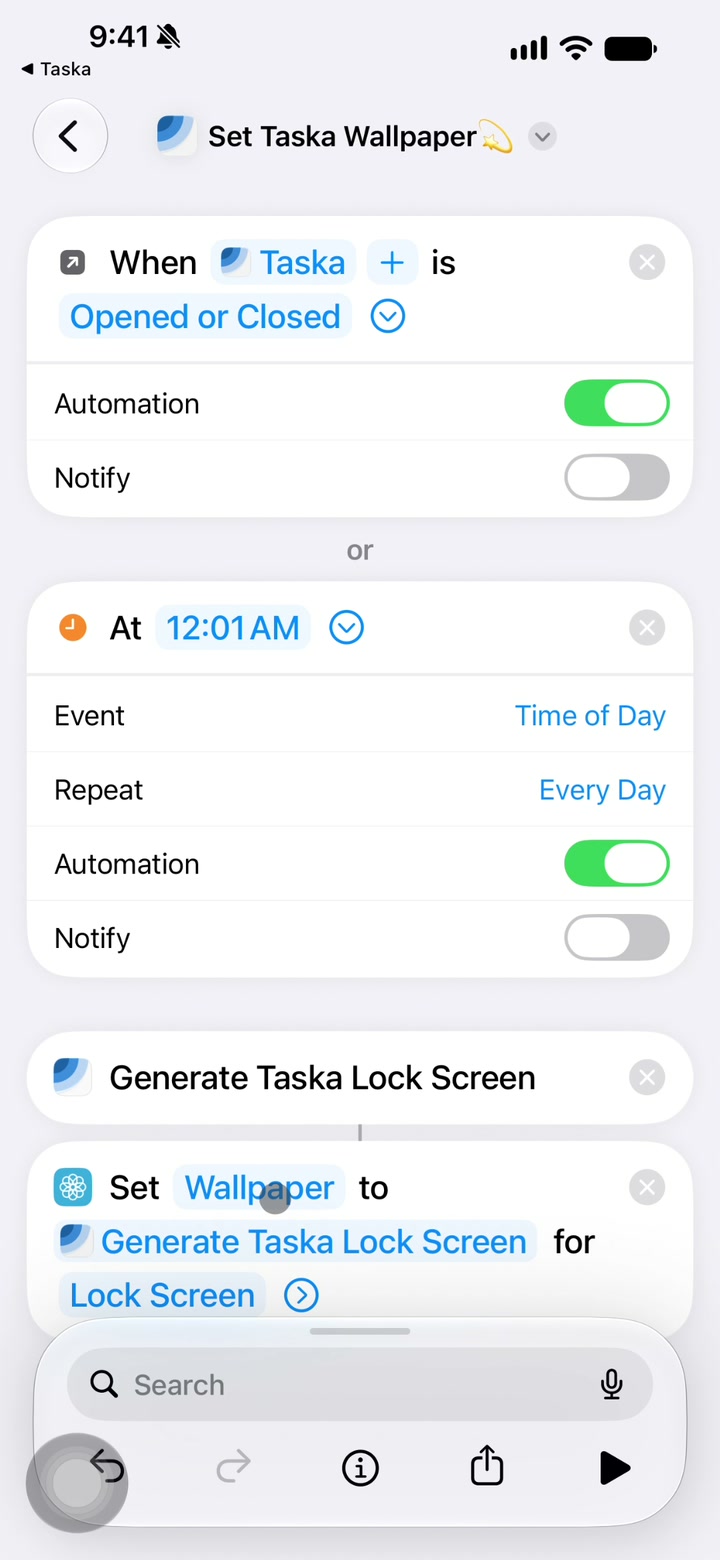
From All Shortcuts, open the new Taska shortcut to enter its editor. Then turn on both automation rules.

  • When Taska is Opened or Closed: Automation on, Notify off
  • Every day at 12:01 AM: Repeat Daily, Automation on, Notify off

The Lock Screen will not update automatically if either automation is off.

Opening the Taska shortcut editor and turning on both automation rules
Open the Taska shortcut → turn on both automations
5

Select the Photo Lock Screen you created

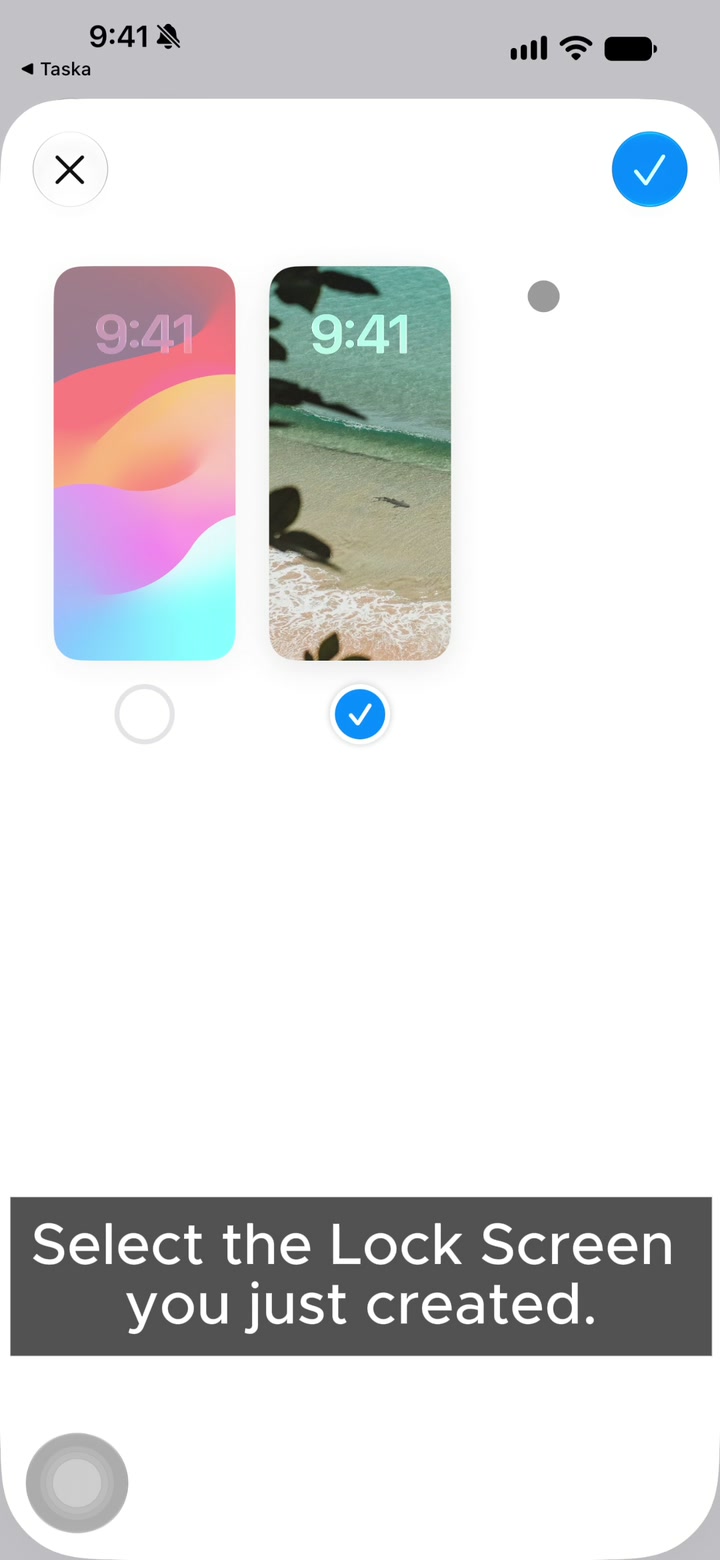
Tap the Lock Screen value in the wallpaper action near the bottom of the shortcut. Select the Photo Lock Screen from Step 1, then use the check button at the top right to save it.

  • Tap the selection circle below the Photo Lock Screen from Step 1.
  • Tap the check button to return to the shortcut editor.

Only a Photo Lock Screen can be selected here. If no Lock Screen is available, return to Step 1 and create a Photo Lock Screen first.

Selecting the Photo Lock Screen created in Step 1 and saving it in the shortcut
Open the Lock Screen field → select the Photo Lock Screen
6

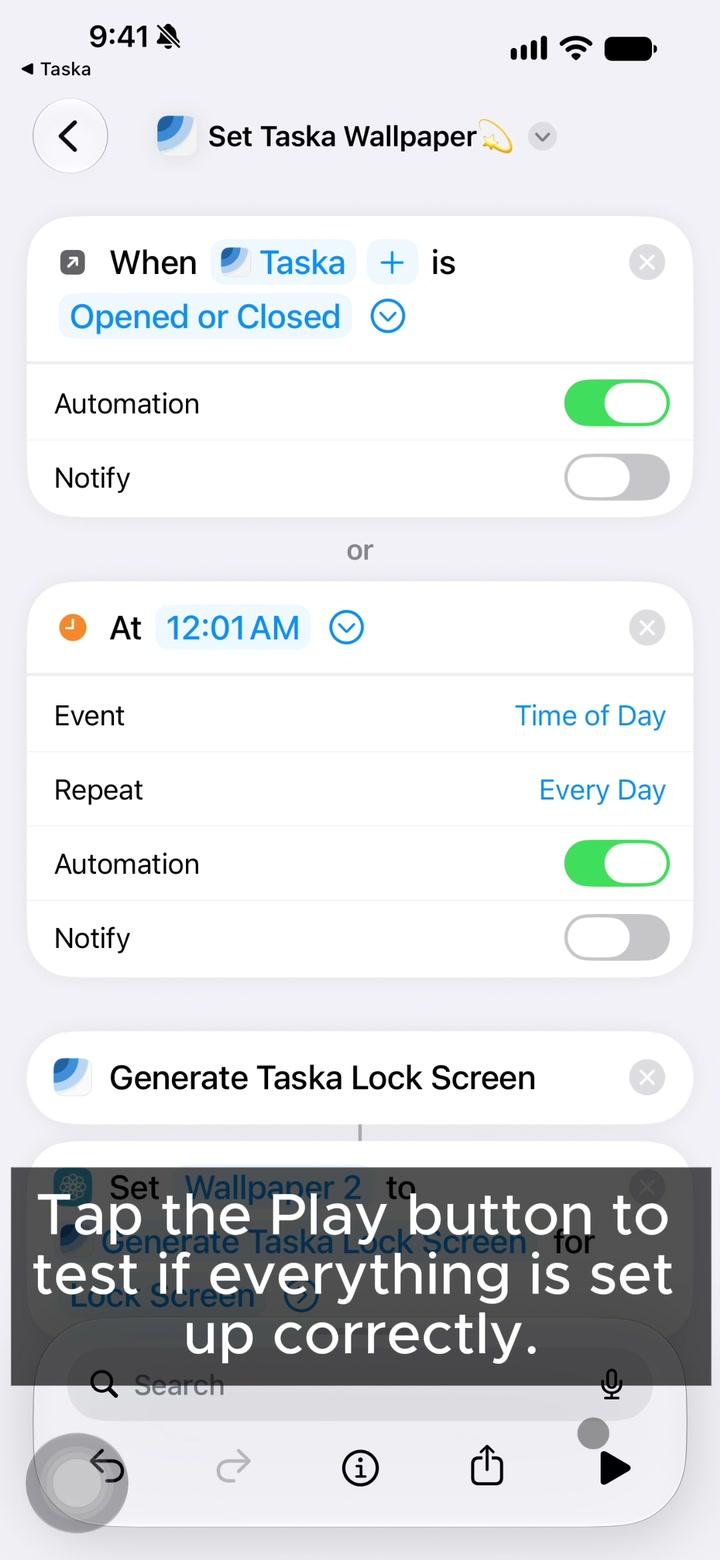
Test the setup with the Play button

Tap the Play button at the bottom right of the shortcut editor. On the first run, allow both prompts for Taska interaction and wallpaper changes.

  • Tap the Play button at the bottom right.
  • Allow both permission prompts on the first run.

If the Taska matrix appears on your Lock Screen, the test passed. It will now update when Taska opens or closes and every day at 12:01 AM.

Testing the Taska shortcut with the Play button, allowing access, and checking the Lock Screen
Play → allow access → check the Taska Lock Screen

FAQ

Q.The Lock Screen I want is missing.
Lock Screens that cannot replace their photo, such as Apple's built-in wallpapers, are not listed. Create a Photo Lock Screen as shown in step 1 and try again.
Q.I denied a permission by mistake.
As shown in Step 6, open Set Taska Wallpaper again in Shortcuts and tap the Play button at the bottom right. When the requests reappear, allow Taska interaction and wallpaper changes.
Q.The Lock Screen still does not update automatically.
Confirm that both automations are on and that your current Lock Screen matches the Photo Lock Screen selected in step 5.
Q.How do I change the matrix position or size?
Adjust it in Taska's Lock Screen Display settings, then run the shortcut once. Your changes appear immediately.
Q.How can I show the matrix on the Lock Screen but use a different Home Screen wallpaper?
You can set a separate Home Screen wallpaper in iPhone Settings > Wallpaper.
Q.Tasks keep disappearing or do not appear on the Lock Screen.
This is an Apple OS issue that occurs on iOS 18. Update your iPhone to iOS 27 or later to resolve it.
Q.“Unable to complete the action. (com.apple.extensionKit.errorDomain error 2.)” appears.
This is an Apple OS issue that occurs on iOS 18. Update your iPhone to iOS 27 or later to resolve it.
Q.“Unable to set a photo on the selected wallpaper” appears.
This happens when the selected wallpaper does not support replacing its photo.
Create a Photo Lock Screen as shown in step 1, then select it in step 5.
Q.I completed the automation setup, but the wallpaper still does not update.
Your current Lock Screen must be the Photo Lock Screen selected in step 5.
Long-press an empty area of the Lock Screen and switch to the screen showing the Taska matrix.
Q.My Lock Screen wallpaper looks blurry or low-quality.
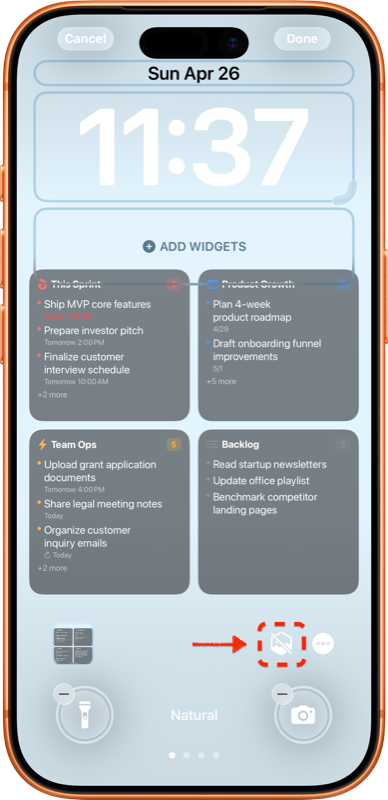
Turn off “Generate Spatial Scene” while setting up the Lock Screen wallpaper.
When enabled, iOS converts the photo into a 3D effect, which may reduce image quality. Location of the Generate Spatial Scene option
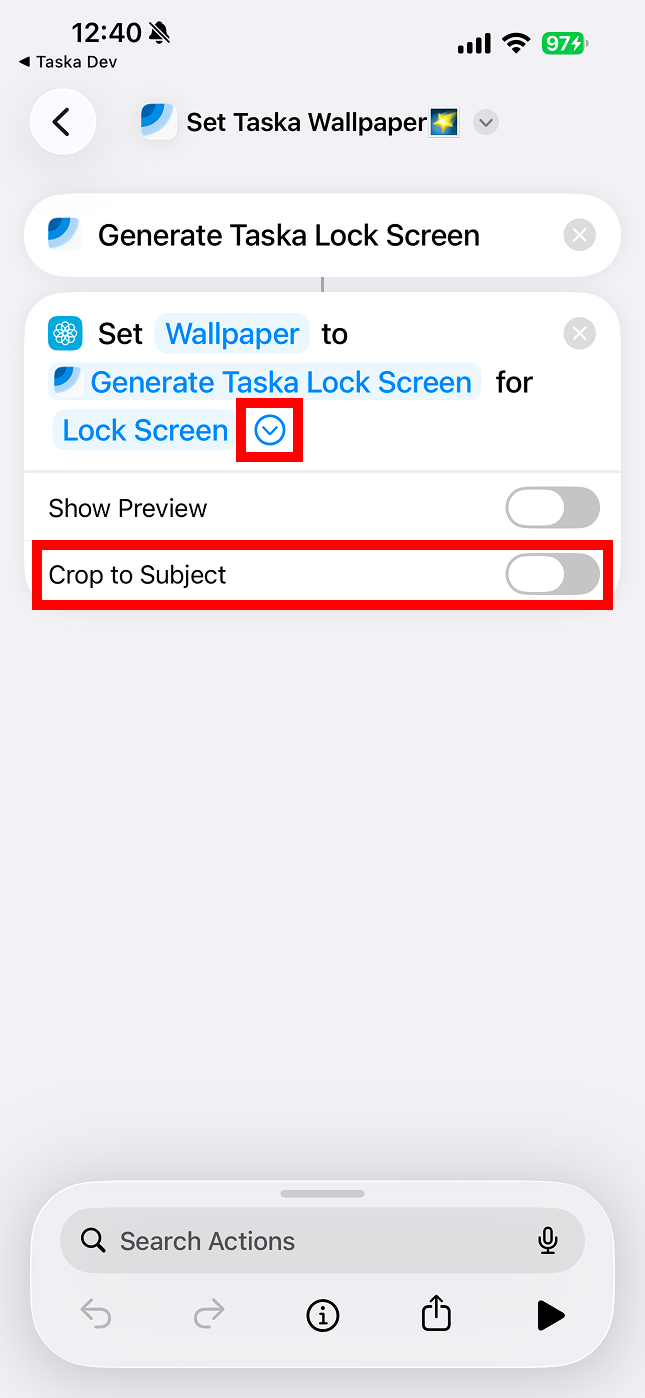
Q.The Lock Screen I set looks zoomed in.
Turn off “Crop to Subject” in the Shortcut options.
When enabled, iOS may zoom the image around the detected subject. Location of the Crop to Subject option
Q.I finished setup, but I cannot see my tasks on the Lock Screen.
The shortcut only applies to the Lock Screen selected in step 5. Your current screen may be different.
Long-press the Lock Screen, swipe left or right, and select the screen showing the Taska matrix.
Q.The wallpaper edit screen appears every time the shortcut runs.
“Show Preview” is enabled in the shortcut's “Set Wallpaper” action. Turn it off to apply the wallpaper quietly without a screen transition.

Contact

If setup still does not work, capture the screen where you stopped and send it to us. Tell us which step you reached so we can check it faster.